A new Harmonium 2: Deconstruction
Start with Part 1.
I just wanted another portable harmonium. Whether that meant buying or building one.
I saw one on eBay, listed as a fixer-upper that doesn’t play. I had to get it. In the best case I would have a harmonium. In the worst case I would have learned something.
The seller was quite open about it not working. I took the gamble, and met him in a car park off the M4. It looked exactly like its photo.
Unfortunately it sounded exactly like its photo too. That is, no sound. I’d figured the bellows were shot and I might be able to get something out of it if I only pedal hard enough. But no. There’s only so much pump organ diagnostics one do in a car park off the M4 without drawing attention.
I took it home, imagining that someone had taken the reeds out.

The name plate reads “Mason and Hamlin, by appointment to Queen Victoria". I imagine this instrument is about 120 years old (I’ve not done any research). Under the keys is a cheeky red trim, by which I’m sure she would not be amused.

I wondered how many hands had played it over the decades, and in which pair the the reeds now resided.
William Stickers
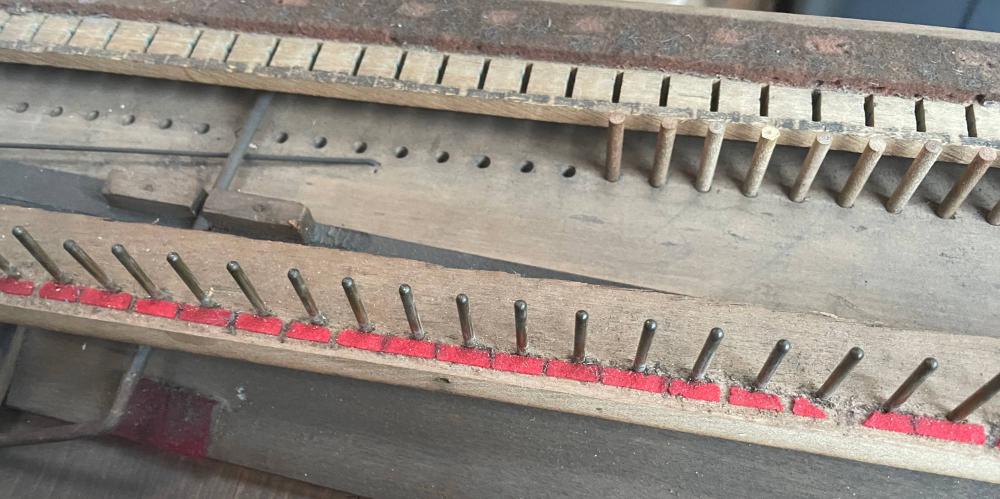
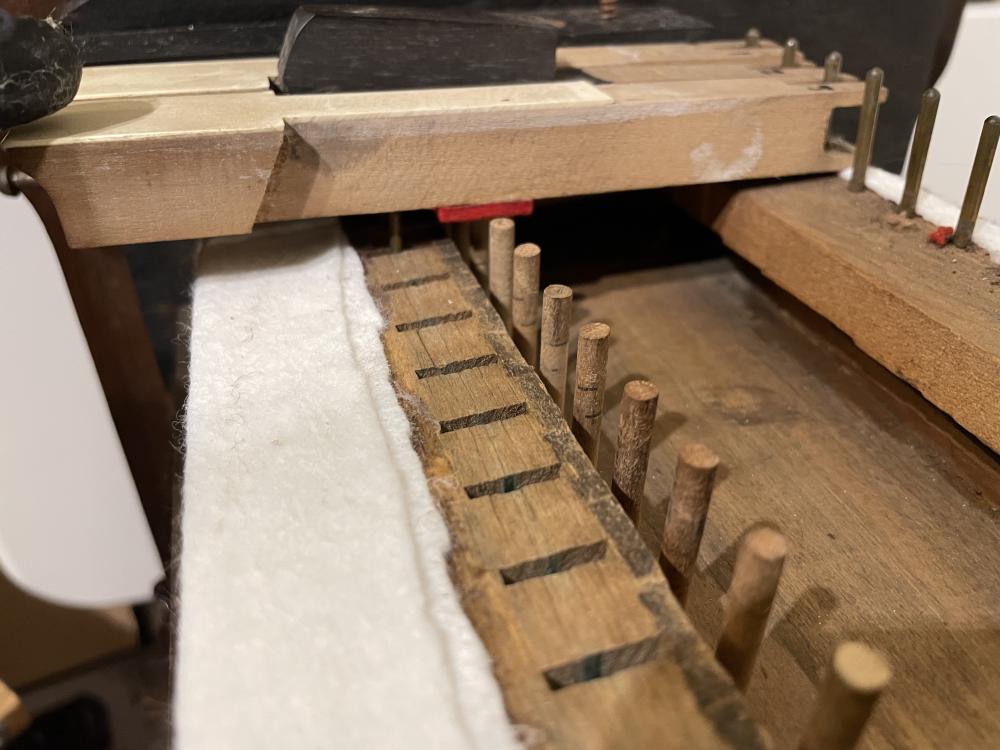
But what I found when I got it home was that the dowels (aka ‘pitman rods’, aka ‘stickers’) had somehow become warped over the years and got stuck in their holes. Nearly every one was stuck down.
These are pushed down by the keyboard, through to the pallets. The pallets let air through the reeds, and are spring-loaded, pushing the key back up.
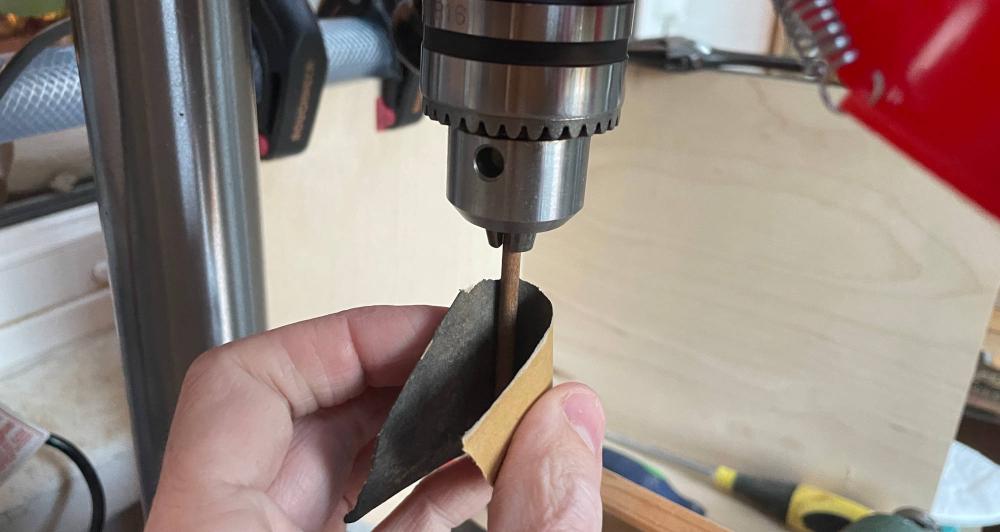
My hypothesis was that with all the notes stuck down the pressure on each reed was too low to sound. So I took them out one by one and gave them a gentle sanding down with fine grit sandpaper.
After that they did return. The bellows were indeed shot, but I could at least get it to make a small noise for each note, which was a comfort.
Valves within valves
The pump bellows were falling apart around the creases. Not a surprise given its age. The previous owner had stuck some gaffer tape over the affected areas. Not unreasonable as a diagnostic step, as the bellows were beyond repair.
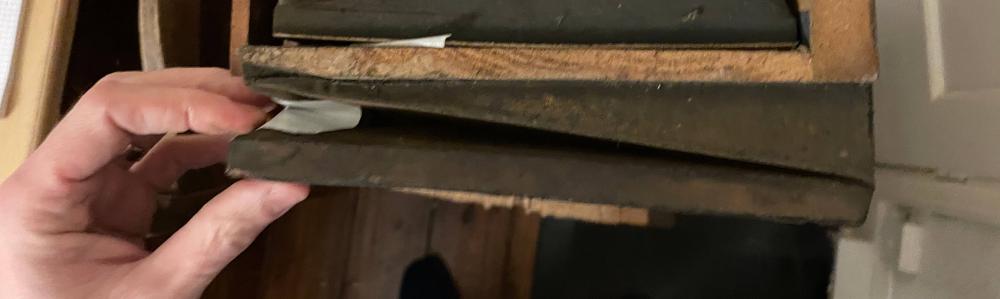
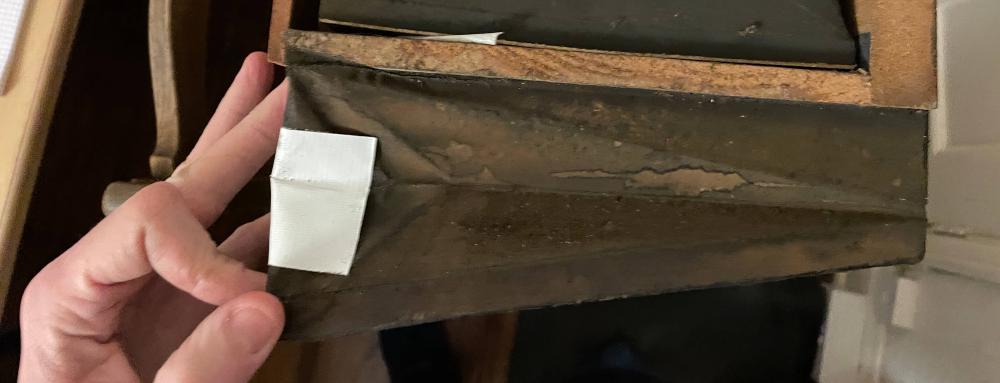
I put some masking tape over the check valves to seal them off so I could test the air-tightness. It was clear both that I needed to replace the valves, and that there were no major leaks unaccounted for.
There’s a check valve to exhaust each pump bellows on the outside, but also one within the bellows that’s inaccessible without taking it apart. That one would have to wait.
The pump bellows have comparatively limited travel, which means every bit of air-tightness is important. You can make up for leaky bellows by pumping faster but it’s not much fun for anyone involved. Not least the poor souls who are obliged to watch you play, rather than listen.
Bellows shape
The Mason and Hamlin organ is build very differently to the Bilhorn.
The Bilhorn has hinged (i.e. book-shaped) bellows as the reservoir. This opens toward the front. The two pump bellows are built directly onto this, and open toward the back. This means that the whole assembly folds up flat for storage. The pulling force from the pedals goes directly downwards and is communicated via the hinge in the reservoir which makes for a robust design (I’ve not been inside but I assume there is one).
Crucially the pump bellows in the Bilhorn have return springs, which means that the player pulls down and lets the pedal rise back up. This allows the communicating piece to be a flexible strap, which folds together neatly.
In the Mason and Hamlin the reservoir bellow has no hinge. This gives it theoretically double the capacity, as its cross-sectional area is rectangular rather than triangular. But it means that there is no fixed place to mount the pump bellows. Therefore the reservoir sits in a rigid frame with the pump bellows mounted beneath.
The pump bellows do not contain a return springs, which is stupid, so the player has to push them closed with an upward force. This means that the linkeage has to be rigid (steel rods), and the whole foot has to pivot around a fulcrum so you can use your heel as well as your toe.
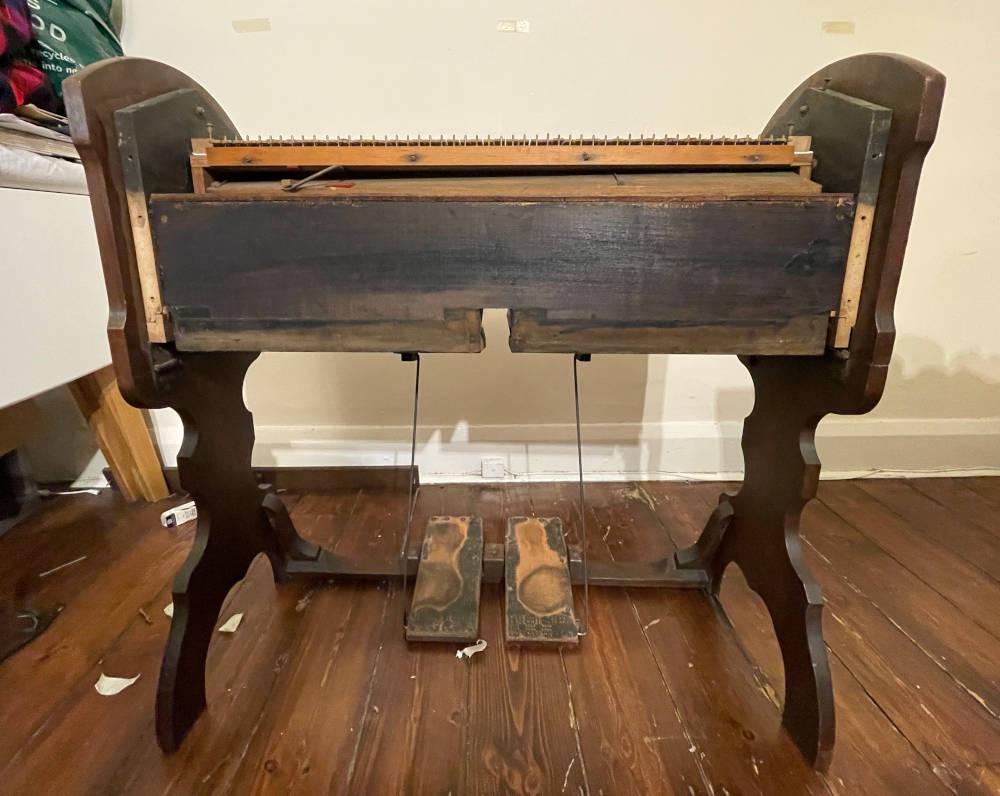
The result is a much more bulky instrument. This one can fold but it’s not coming with you on a bike.
This organ has other design faults, which I am now so annoyed about I will save them for a future blog post.
Taking it apart
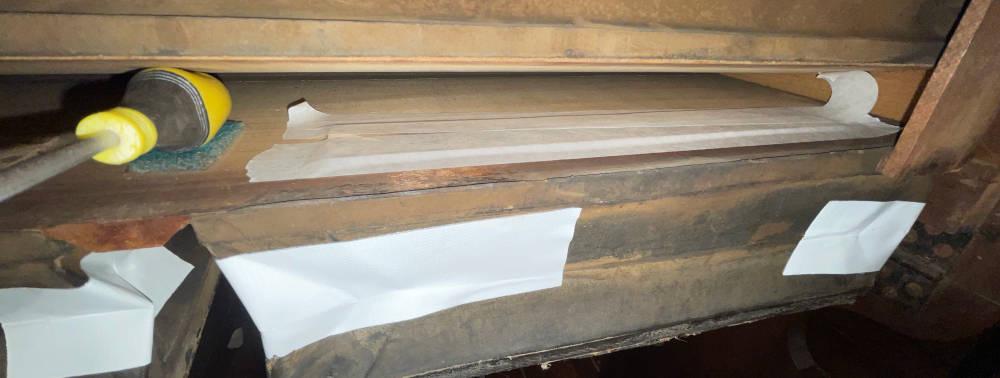
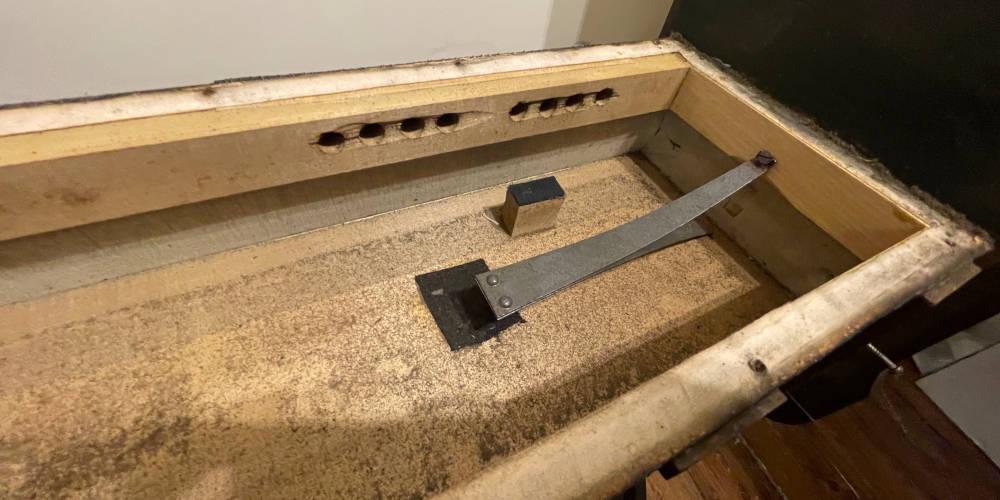
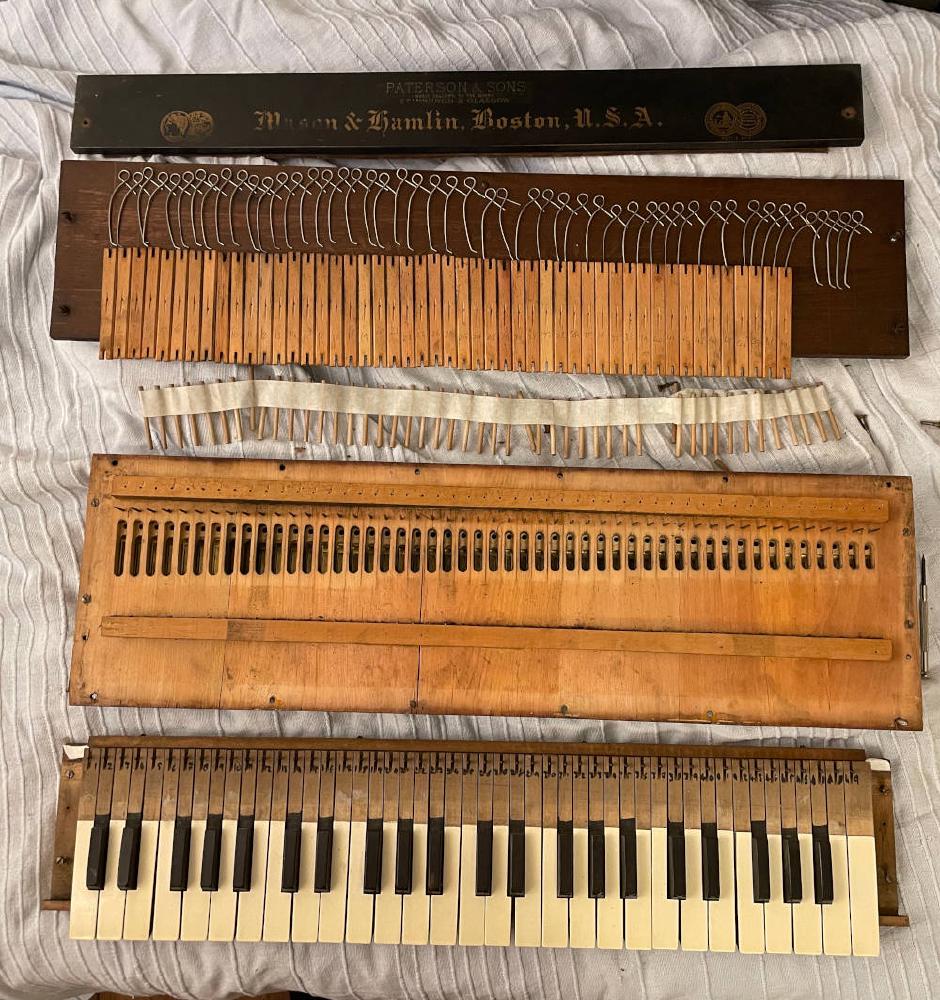
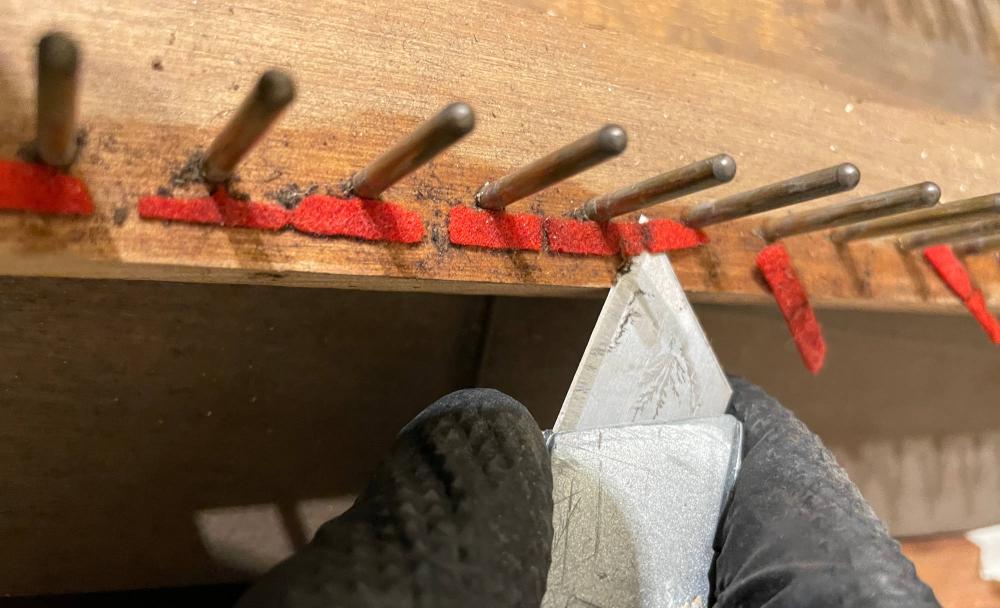
I unscrewed it piece by piece. Here you see the pallet springs, which are used to close the pallets. Below them, kept in order by a piece of masking tape are the stickers. Below that is the wind chest, seen from below. The pallets cover these holes.
Looking closer, you see a long block with holes in (covered by my thumb). This is where the pallet springs are held and is therefore under quite a lot of stress. In my haste to unscrew the pallet board I took out the screws that retained it.
No harm done, it was glued and I put the screws back. But there’s a lesson in not unscrewing things unless you know exactly why you’re doing it.
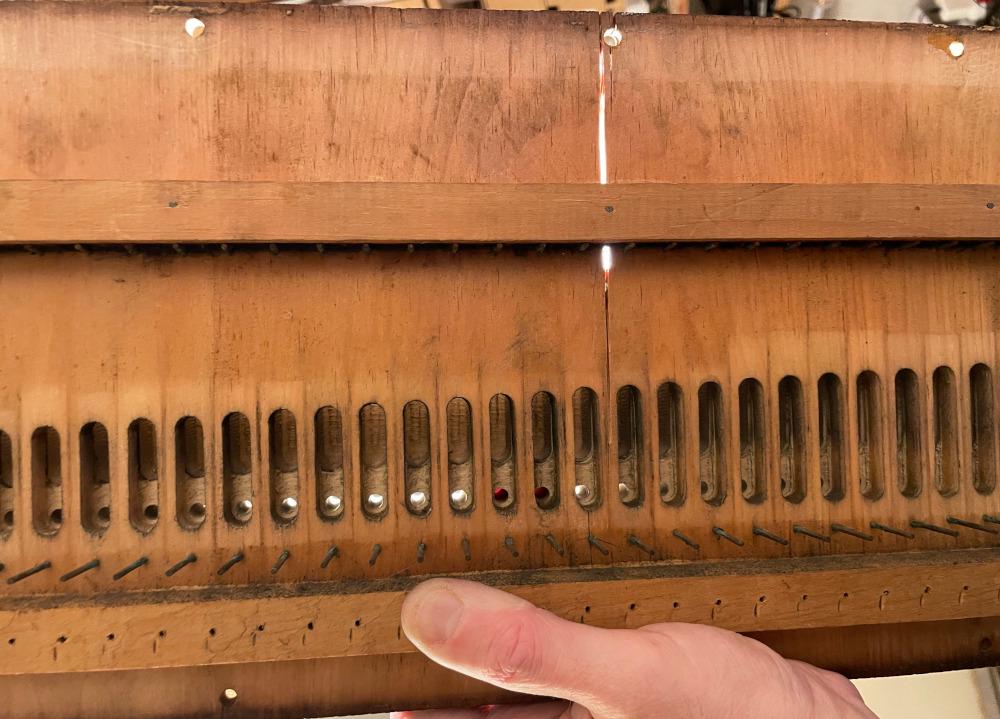
But as I hold the board up to the light, there is another glaring problem here. The board has warped, leaving several large cracks. I couldn’t just clamp these closed: the board had warped but the other pieces hadn’t, and the dimensions were otherwise stable.
I didn’t have sufficiently fine sawdust to fill the gap, especially for the smaller end. So I tried using baking soda and superglue, a recognised technique which I’d tried before. My reasoning being that the bicarbonate is milled very finely, and would be ideal for going into the cracks.
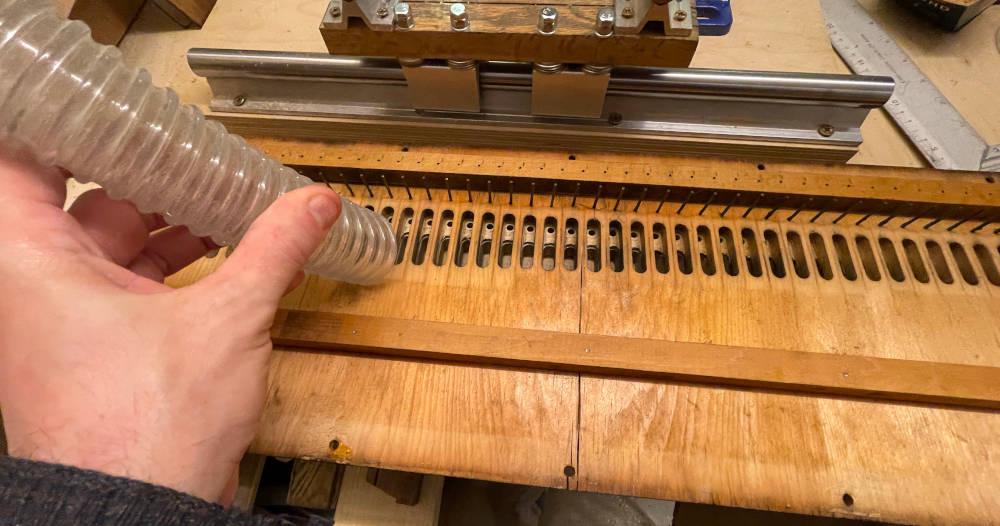
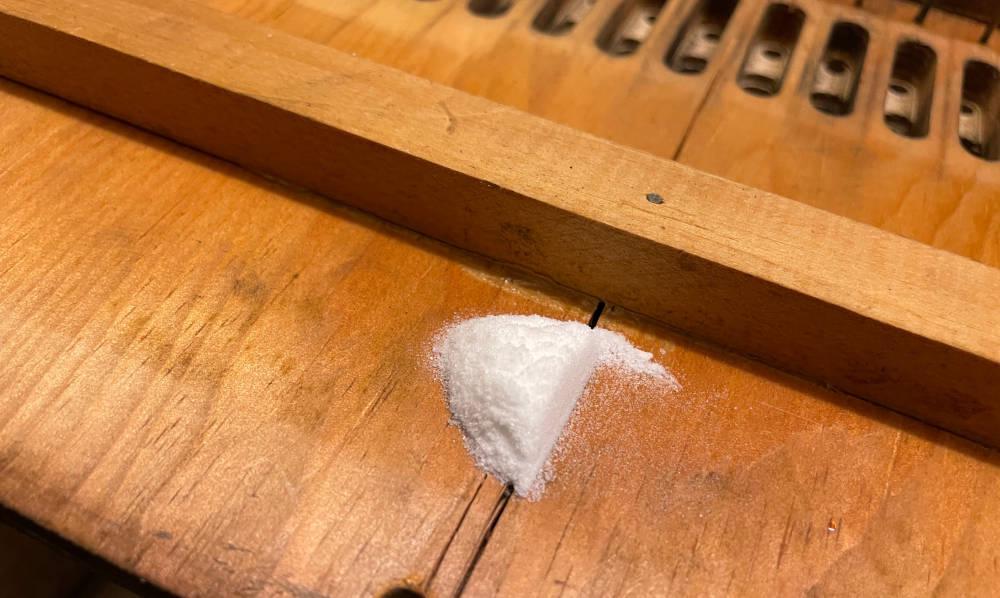
Let me gloss over what happened next. After some sanding down it did the job, but I would recommend something, anything, else next time. Fast acting glue is far harder to work with on fiddly jobs. The theme of our times.
Keyboard
The keyboard is wobbly.
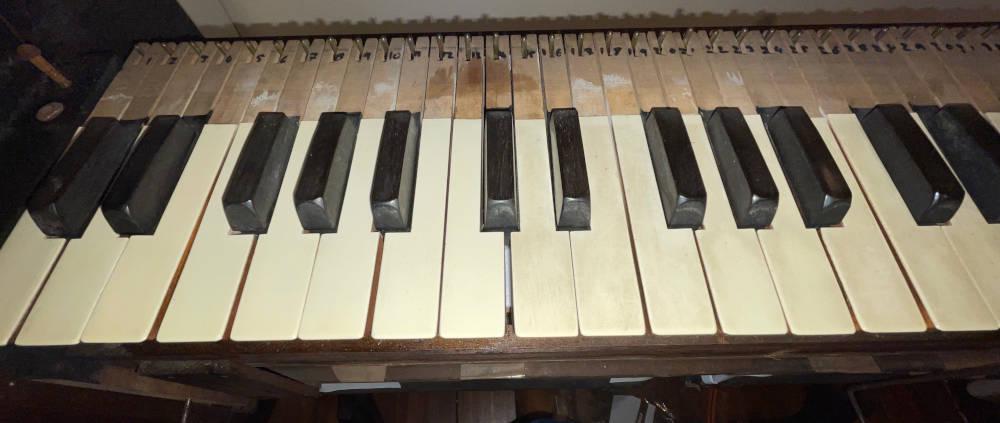
I replaced the old red felt with white (I didn’t have any black, as Queen Victoria would have preferred).
There was no bushing for the pins, which is where I’d probably start with sorting out the wobble. But it’s relatively low priority, and perfectly playable with the wobble.
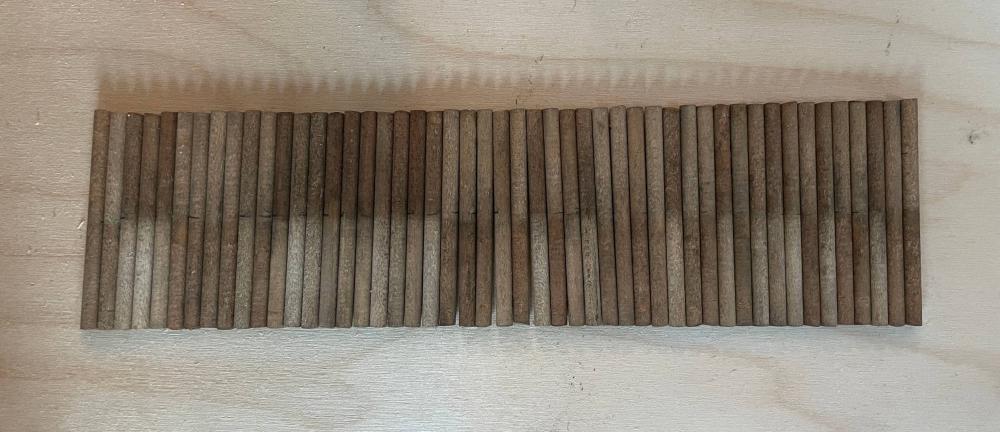
The pallets, and most of the organ, were absolutely filthy inside. Probably coal dust. I gave them each a quick clean with some masking tape. There was more coal dust left, but I didn’t want to damage the very fine leather. This is the clean pile:

So, harmonium deconstructed I was ready to tackle the most unfamiliar part: the bellows.
Lessons Learned
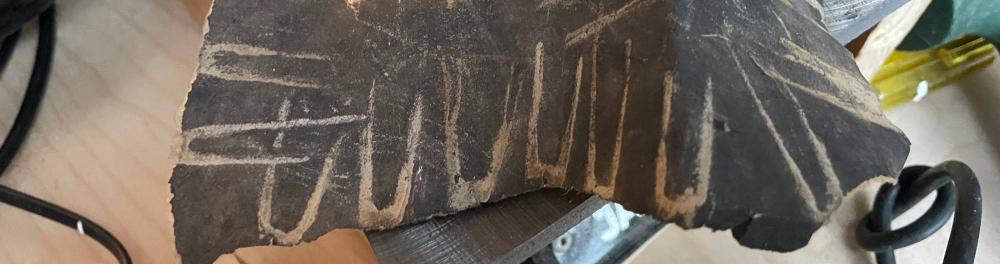
- Write numbers on everything. It allows you to put things in a box without keeping them laid out flat. This allows for long-running projects and the presence of cats.
- When taking something apart blind, think about every screw individually. Don’t remove a screw if you’re not sure.