A new harmonium Part 3: Bellows
Start with Part 1.
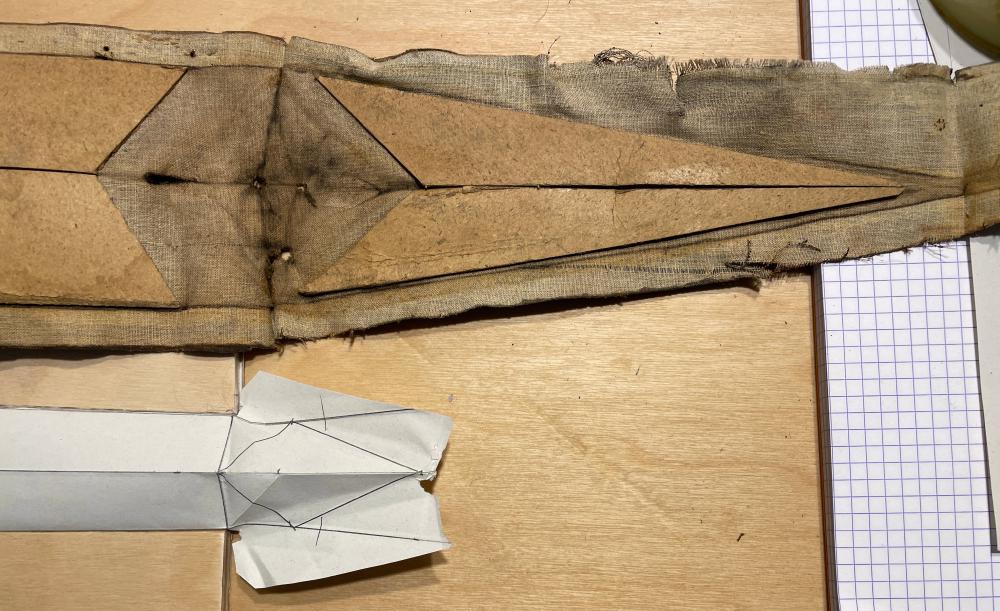
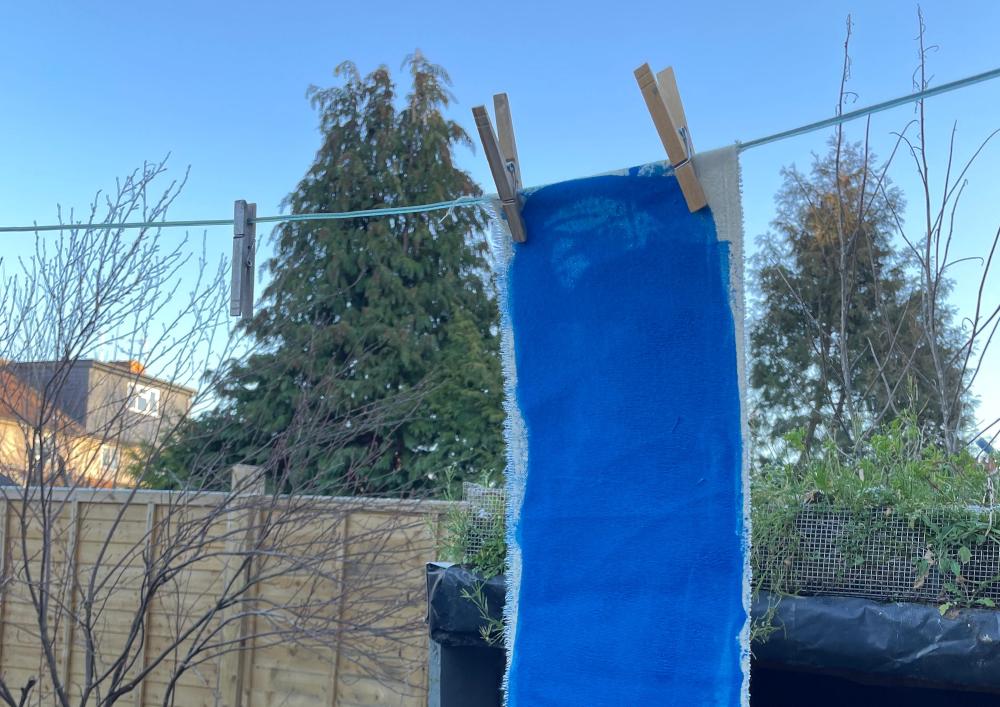
Bellows are a mystery to me. Even now. There are plenty of tutorials showing you how to draw lines on paper and then fold them up, but my brain doesn’t find it easy to visualise it. Easily solved, I’ll just make a model.
With two pieces of scrap wood, sellotape and paper, I approximated.
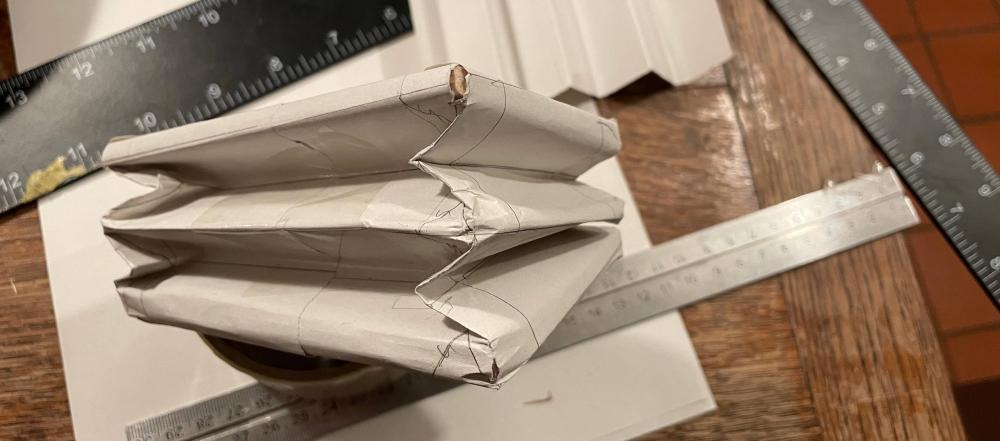

I wish I could say that as I folded the paper I suddenly gained enlightenment. No such luck. The paper just transformed from ’normal’ to ‘magical’ in my hands without sharing its secrets.
This design is good for accordions, but not for hinged bellows.
I looked at the fold on the Mason and Hamlin and tried to visualise the fold pattern.
I folded the paper into the right shape as I closed the bellows and ended up with something reasonable.
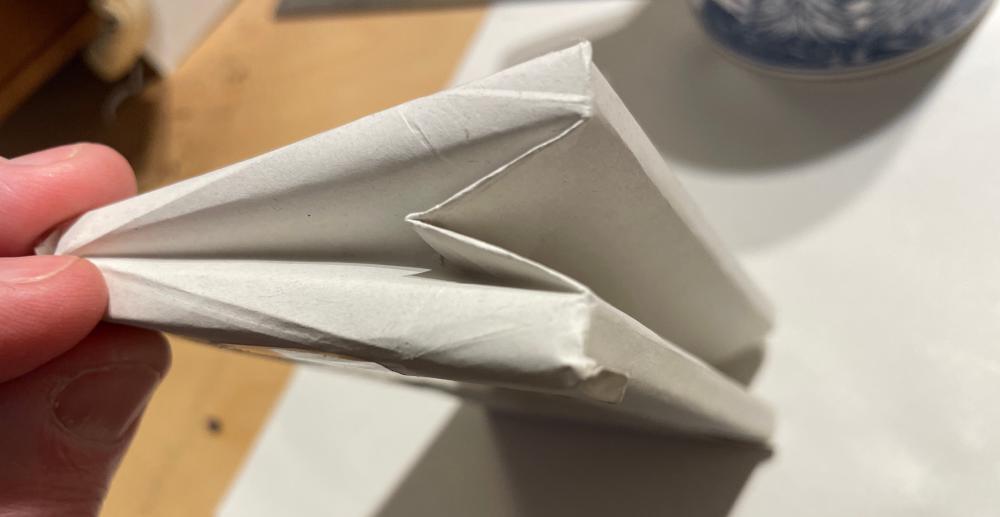
Unfolding it, I saw that I’d got the important fold exactly backwards:
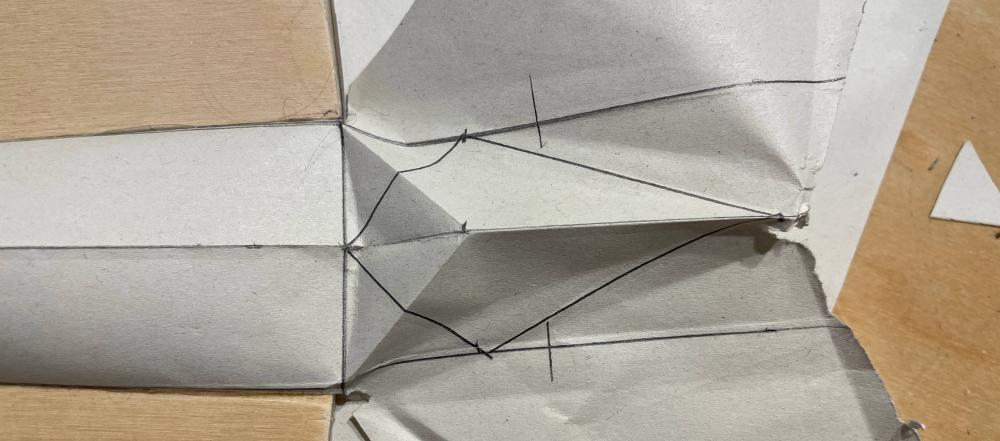
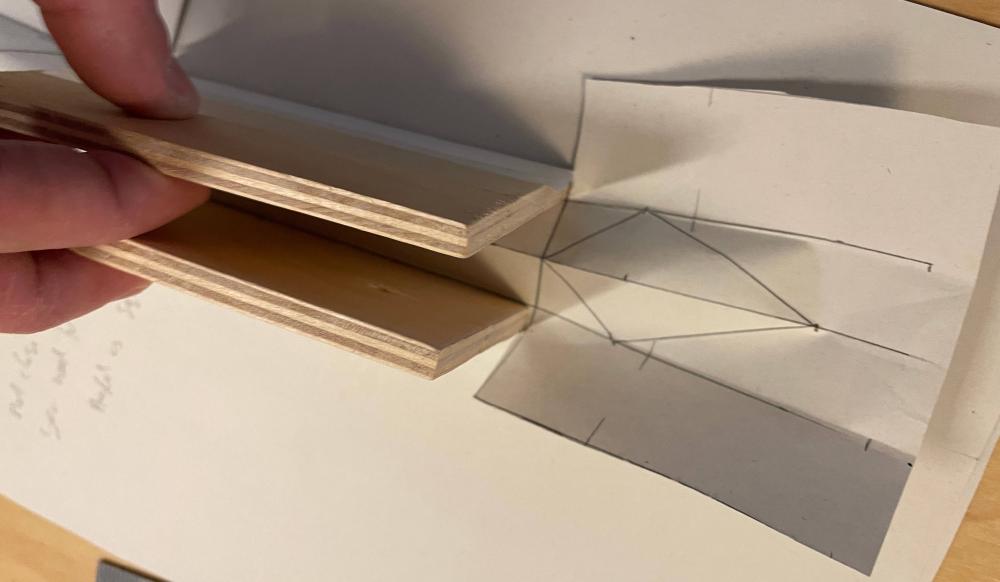
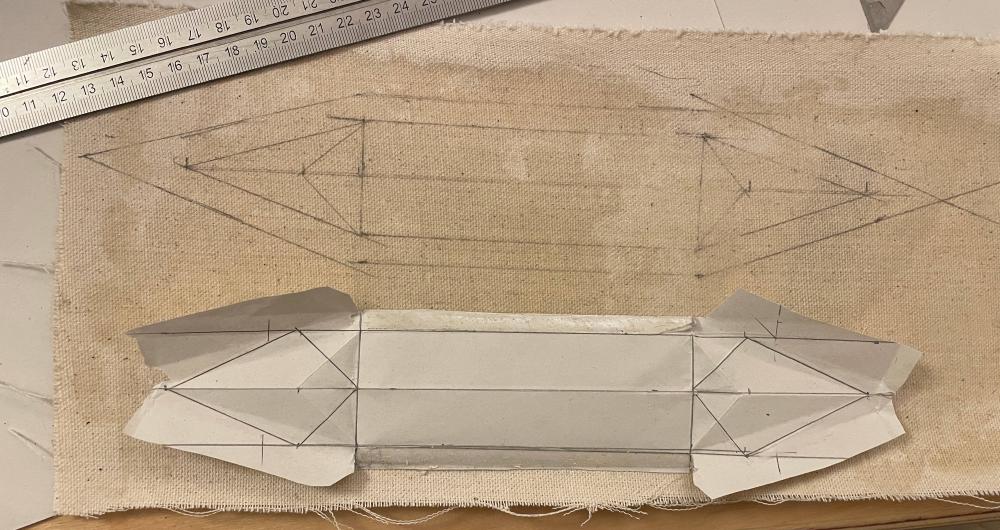
Good. I learned something, and that’s what models are for. I transferred the design onto canvas and cut out my first real, if miniature, set.
Thinking ahead to the final construction, I was forbidden by my wife from using hot animal glue. She’s used it before, and says it smells like death. I can well believe it.
On Ian Stevenson’s advice, I chose contact ahesive. This is a rubber-based glue that remains flexible. You apply to both sides, let it soak in and dry for a few minutes, and then press the two pieces together. The bond is immediate. No second chances, so you need to get it right first time.
So, to practice, I used it on my model bellows.
I used reasonably heavy canvas, to be on the safe side. But it needed sizing to make it airtight. As an experiment I coated the inside of the bellows with contact adhesive and let it completely dry before assembly. You can see the uneven finish here:
Success! Airtight bellows. A month later and they are still in good shape.
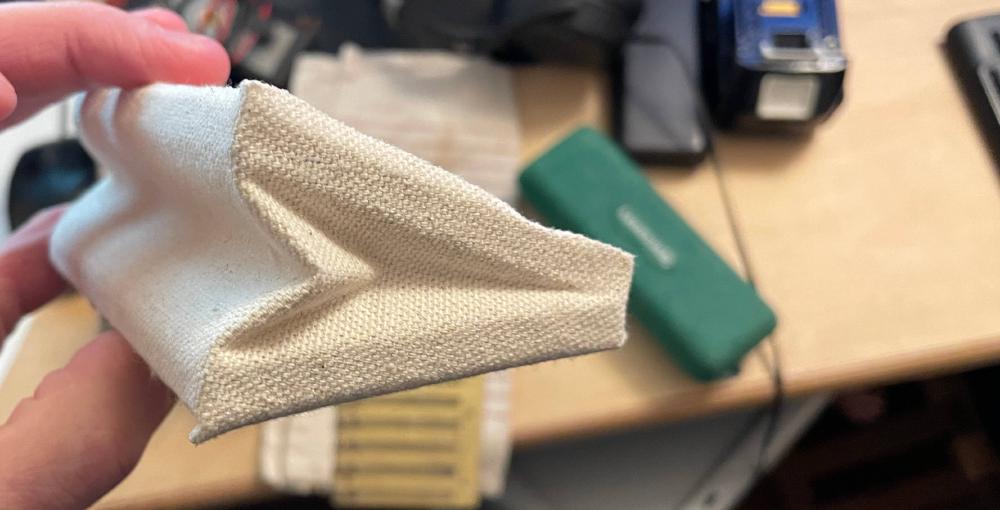
I did make one mistake, which is that the fabric over the spine doesn’t have any slack. This means that when you close the bellows you’re pulling the seam apart. Real bellows have a bit of spare here.
Hotting up
So I pressed ahead, disengaged the safety catch on the the heat gun, and gently removed the century old fabric.
Using a sponge, hot water and gentle heating I got the fabric off intact.
It stretched a bit, but I got useful dimensions.
Symbiosis
I may be in the middle of restoring a harmonium, but I’m in the middle of a lot of things. I haven’t mentioned the drawers full of spare reeds, the hundreds of possibly useless solenoids, experiments cutting wind-chest slots and making valves. And I won’t, not for now.
The current project is to restore this organ. Partly so I have a new one, but partly so I know how to make another new one. In order to learn how to make new bellows I am learning to restore old ones. But I need to make new model ones in order to learn how to fix the old ones.
I am therefore engaged in at least two symbiotic projects, each feeding off each other. But I need to be careful not to get them mixed up. That way mistakes lie.
It’s a lot safer to copy than innovate, especially the first time. Not only do you have a known-good template to follow, but you also have no room to take liberties. Fewer liberties means less space for mistakes.
In my opinion there are (at least) two shortcomings of the Mason and Hamlin’s bellows design: The first is under-sized bellows. I was tempted to make them a little larger but I wasn’t confident that I wouldn’t mess it up, so I didn’t.
The second is that the bellows don’t have return springs, which neccessitates the coupling to be a solid steel bar so you can push them closed, rather than straps.
But I won’t be changing the pedal arrangement, so there’s no point trying to change that either.
Choosing fabric
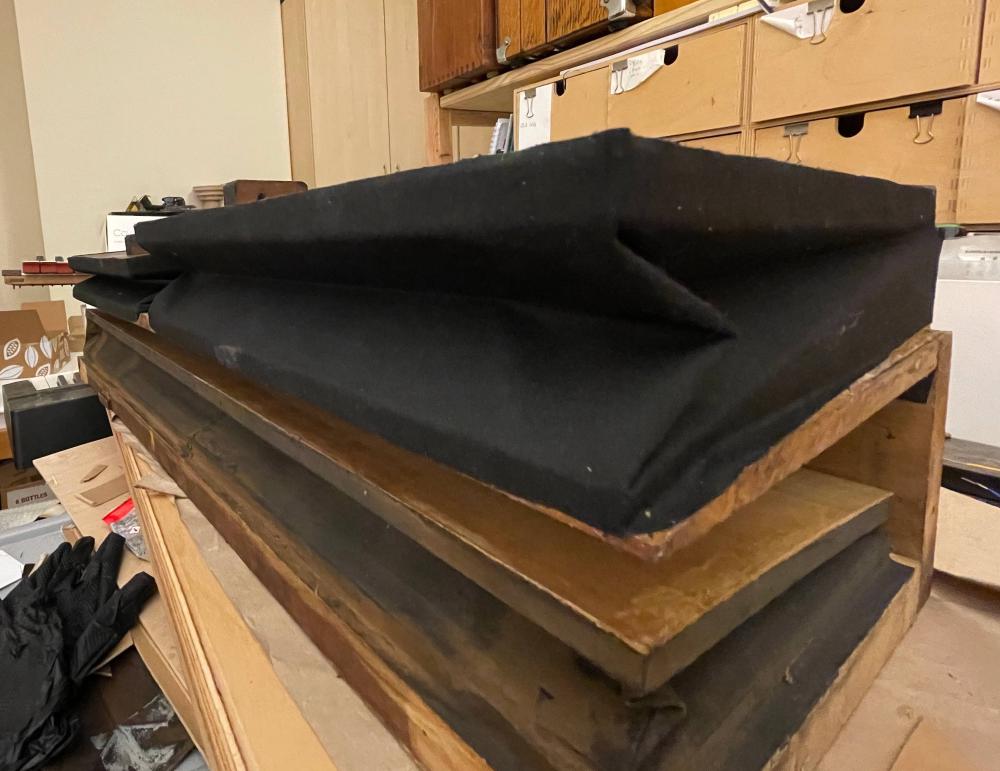
The existing bellows look like they are sized with black paint. It might have been rubber at some point, but it seems very inflexible now.
As you see from this photo against a mechanical pencil lead, the thread pitch is about 0.5 mm. It’s a looser and simpler weave than I’d expected.

I clearly needed to find bellows cloth. This needs to be air-tight, flexible and durable. Especially as I was restoring an instrument, I didn’t think this was the time for experimentation with unpredictable materials.
I’d heard that the original bellows were made with canvas impregnated with latex rubber. I looked through a few options.
I’m still interested in the contact ahesive option. If I make something experimental I will try again. But not for a restoration.
You can buy liquid latex in bottles for casting. But latex will eventually perish. I don’t know how long it takes to happen, but I didn’t want to restore this harmonium only to have the bellows disintegrate after a couple of years.
Another option was liquid latex designed for a longer lifetime. Plasti Dip is intriguing. You dip objects in it, and they come out covered in rubber. It wasn’t cheap, so I bought a small tin.
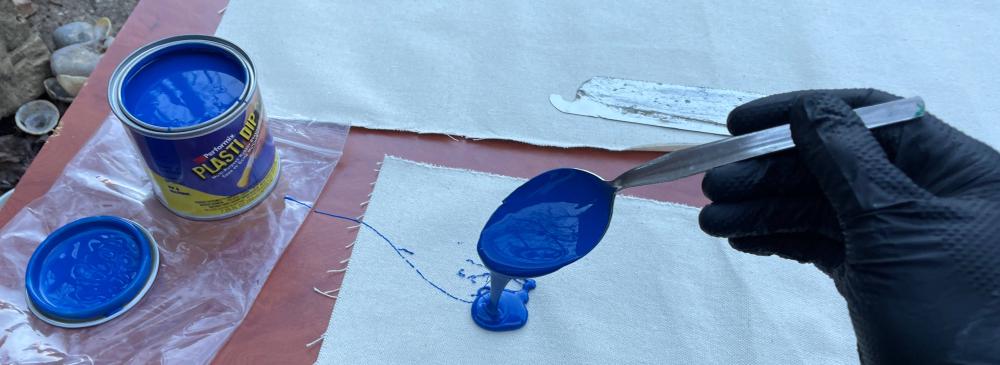
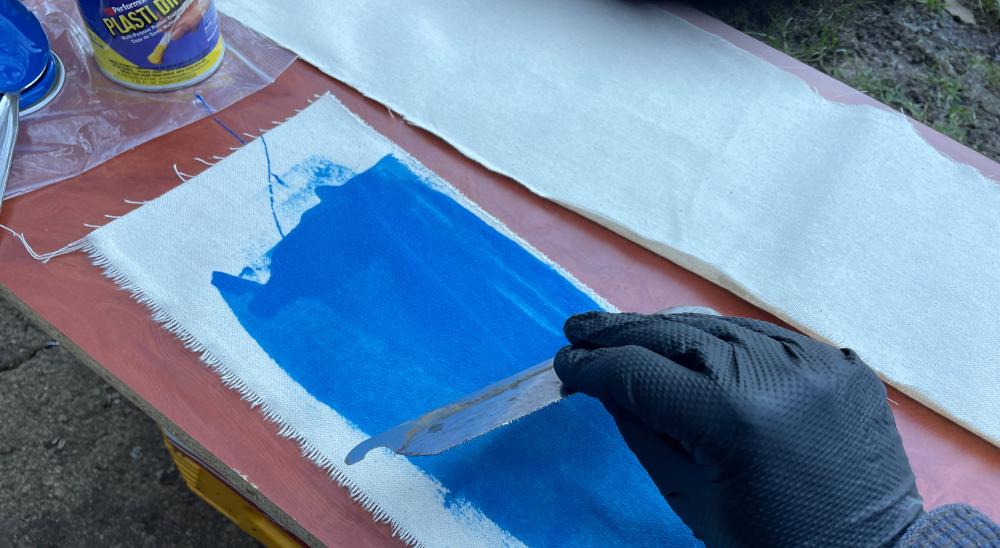
I used an old Japanese saw blade as a filling knife. The process worked well. The liquid did soak into the fabric (which is what you’d want) but I got one coat of one bellow’s worth out of a single 250ml tin, which cost £15. Given how it soaked in I thought I’d need to spend £60 to cover a pair of bellows. For that price I’d need to be dead certain that it would work as expected.
I eventually found this black rubber cloth from Dean Organ Builders. This is a family business with an interesting history! Richard Dean was very helpful in answering my questions and helping me to identify the right weight of cloth (the answer, as with many things in life, is ‘medium’). I didn’t do the exact maths, but it probably works out about the same price as the Plasti Dip, and has the benefit of being made for the purpose.
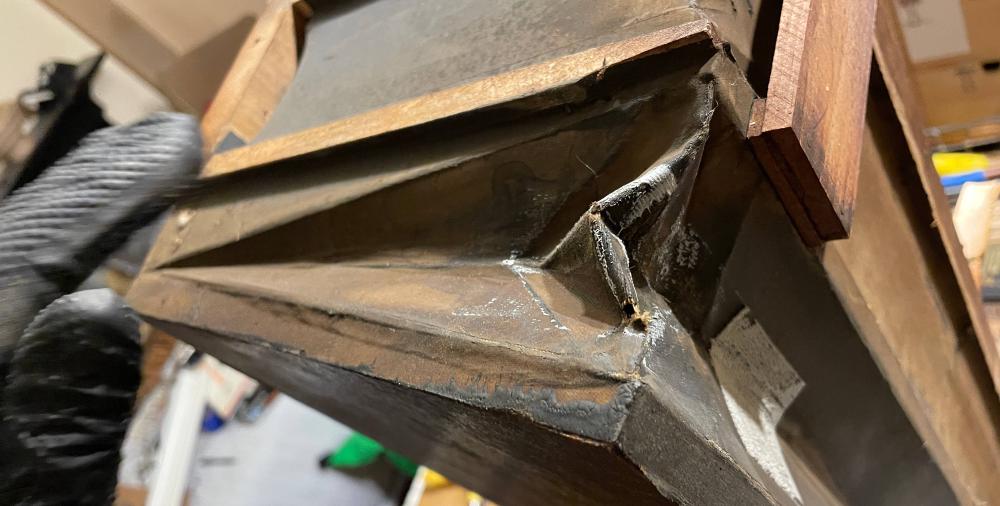
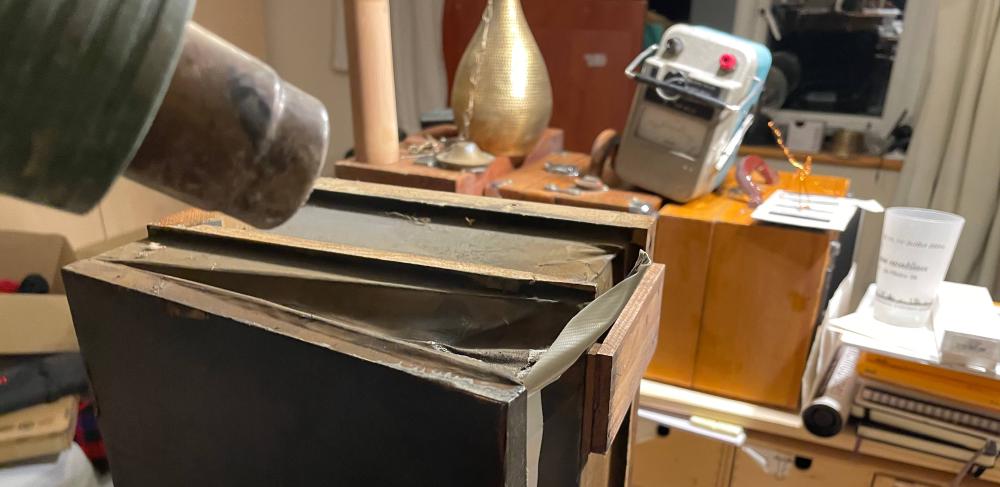
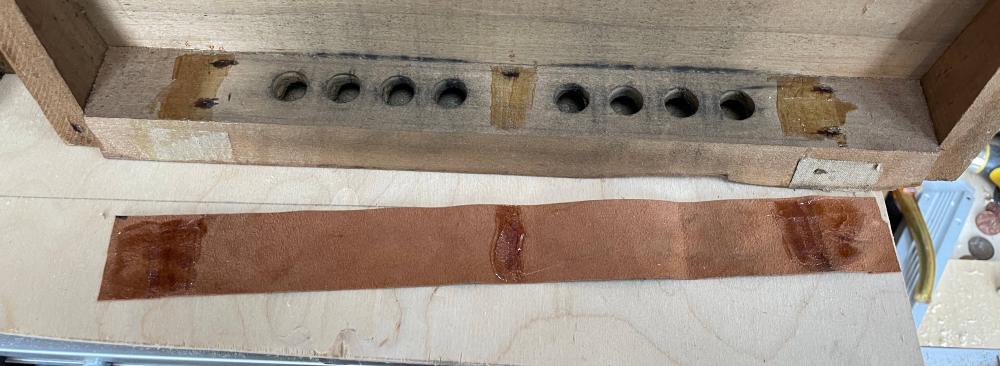
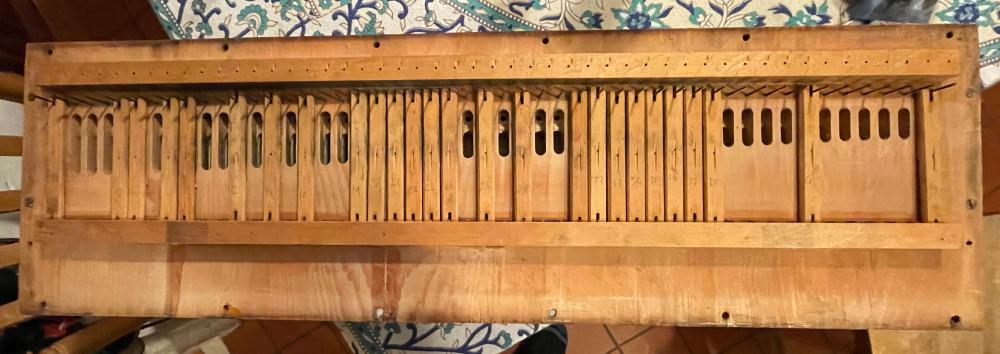
Valve
Once sealed up, the inside of these bellows is inaccessible. The non-return valve was old, inflexible and curled up at the edges. And covered in coal dust. I replaced them with new leather.

Keeping in shape
There are further awkward and unnceessary design decisions in these bellows. The angled rebate cut into the front allows the bellows cloth seam to be glued flush to the top edge. But it does mean that the cloth has to bend round the edges a bit, which makes fitting annoying. The glue-up could have been a lot simpler and squarer. Maybe this was OK with hot glue that can be repositioned, but with contact adhesive it just added to the fear.
They could instead have allowed the bellows edges to protrude downward from the board. This would have added another centimetre to the depth. Given that this instrument doesn’t fold up into a box, the depth isn’t at a premium. For the cost of extra time profiling the wood and the unpredictability of the glue-up, I don’t think this was a wise decision.
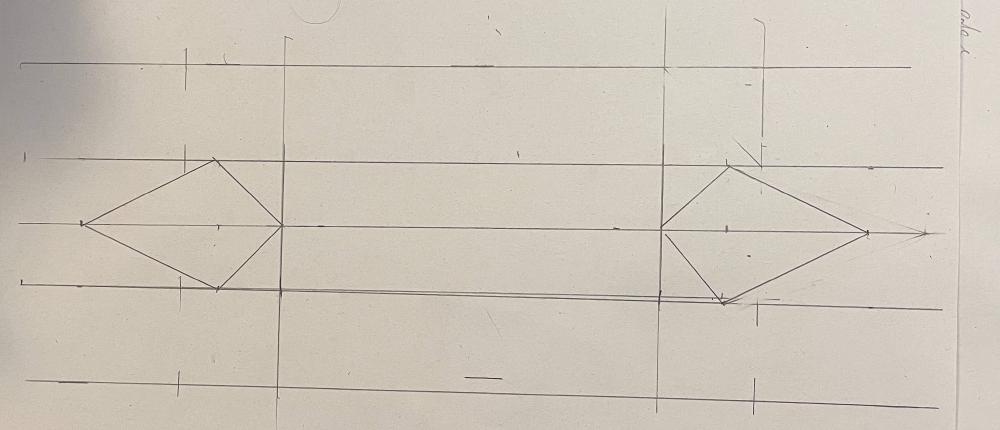
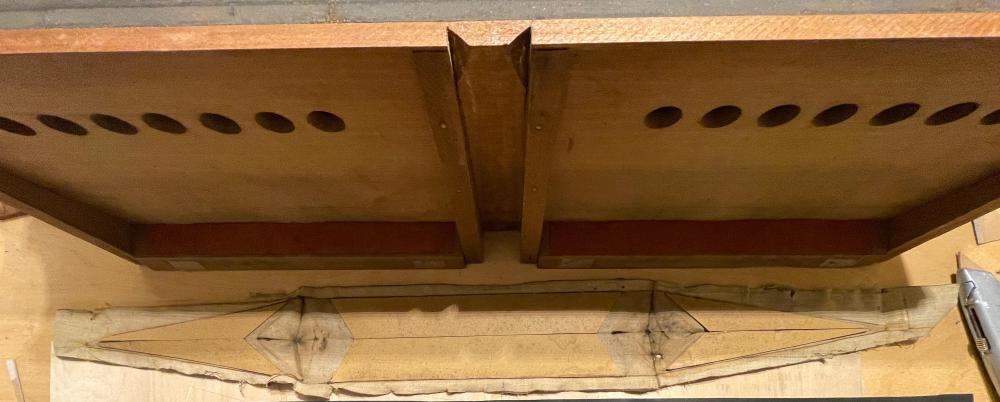
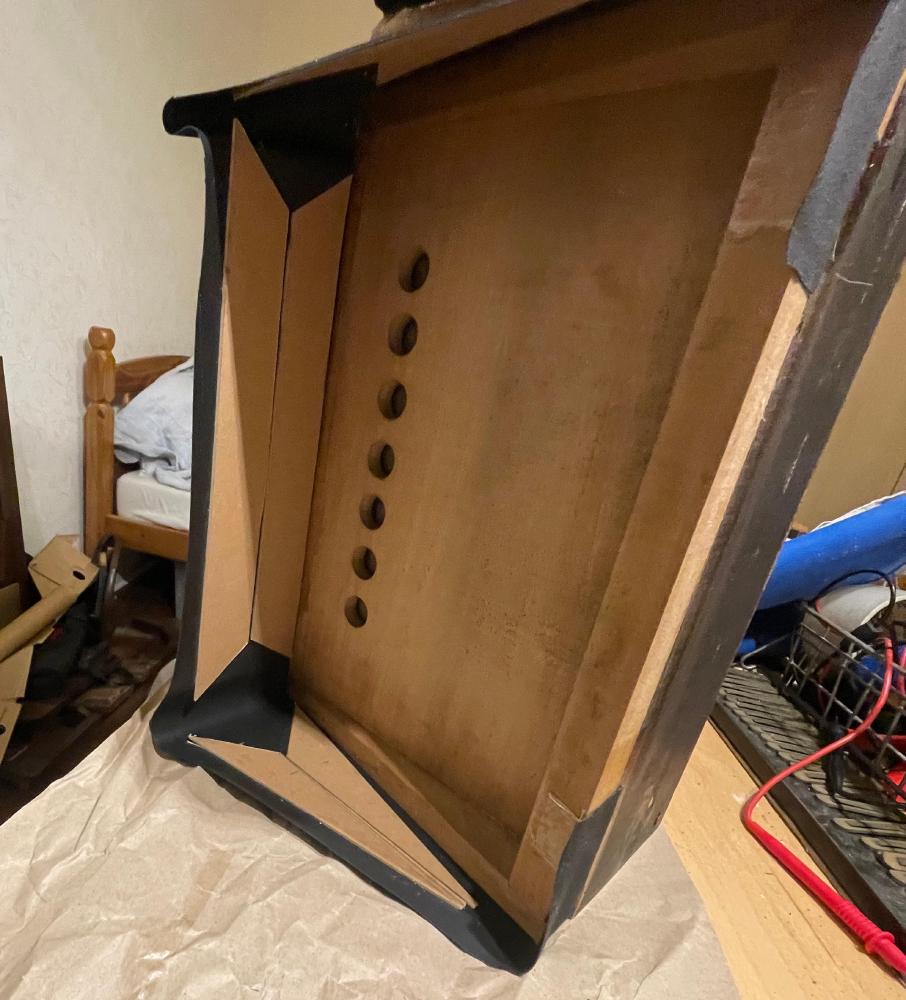
The bellows have stiffener boards in them. They keep the faces of the bellows flat and allow for bending in the right places. Without these the material would sag.
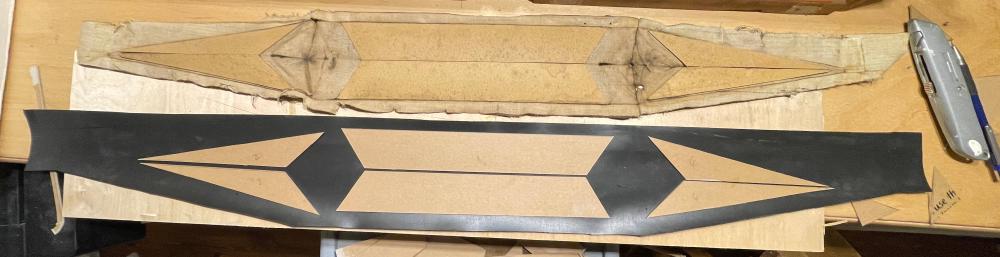
The lozenge-shaped negative space is where the most interesting bit of folding happens. Interesting that they left that part blank rather than exact-shaped siffeners.
I found some nice heavy cardboard to make stiffeners and glued them in with contact adhesive. It took to the rubber cloth well.
I practiced assembling the bellows a hundred times. The fit seemed to be correct.
Keeping the alignment was a challenge. Knowing contact adhesive, if I even touched the cloth in the wrong place, it would likely be ruined if I tried to move it again. I wasn’t confident that I could glue the entire seam on 3 sides, and then align and place the cloth in the right place.
I decided to do it in stages. First the front, then the sides, then the back. I didn’t stop at the corners, as this would have created a join in a place already susceptible to leaks. So I stopped short of the corner by an inch or so. This meant that each corner was done in one go. I first glued the front for alignment, then all the way round the front corners, and then the rest.
No photos from the process, as I was thinking too hard.
I had the top half glued to the cloth, and was happy with the results.
It was then that I realised my mistake.
My mistake
According to the dry-fitting that I’d practiced so many times, the next step was simply to slide in the bottom board. It was a tight fit, but that’s a good thing.
Except there’s no such thing as sliding with contact adhesive. The second I started sliding it in, it would stick.
I had to compromise here. I didn’t let the glue dry completely and instead slid it in before the glue was set. This makes for a weaker bond, but it was too late to do it another way.
The result was pleasing. The cloth looks smart and feels robust enough for the job. It’s certainly air-tight.
And then it was done! I put the pallets back in, and the reeds too. I was glad I’d numbered everything.
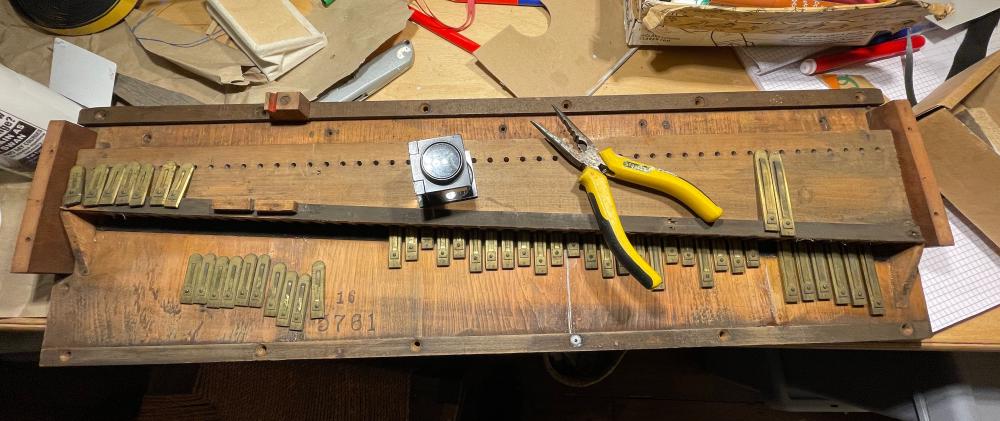
In fact, I put the whole keyboard assembly back together. It played, and sounded lovely.
Tempered by the fact that the tuning was 60 cents sharp of A440 right across the board.
But that’s a story for another day…
Lessons
- It’s possible to make bellows!
- 10 minutes with paper beats 5 minutes of inconclusive frowning.
- Contact adhesive does seem to work as sealant.
- It’s natural to test a new bellows by blowing them on your face. If you must, wait until the glue has set and the solvent has fully off-gassed.
- If you’re going to do something tricky, make a model and practice on that. Then mentally rehearse all the steps as many times as possible.
- Once you’ve done a dry-run, or a run with a model, think about what will be different in the real run.
- Don’t glue the top half of the bellows before the bottom half. Instead work around the edge with both top and bottom in place. Otherwise it’s tricky to get the bottom plate in without it sticking.
Part 4 coming soon…